Viewing Upcoming PTO/Time-Off Reports:
Note: All users will be able to view the Upcoming Time-Off report (subject to their privilege scope). However only Administrators will also be able to view the Allowance Report and Time-Off Summary options.
Once you are logged into your VacationTracker Account and on your Dashboard, the next step is to click on the arrow next to Reports at the top center of the page to reveal a drop-down menu.
All users will see the following option on the drop-down menu:
- Upcoming Time-Off

As aforementioned, only Administrators will see three options on the drop-down menu:
- Upcoming Time-Off
- Time-Off Summary
- Allowance Report

Below we will explain each of these three report options in more detail, starting with the Upcoming Time-Off Report.
Upcoming Time-Off Report:
To view the Upcoming Time-Off Report, click on its link as shown below:

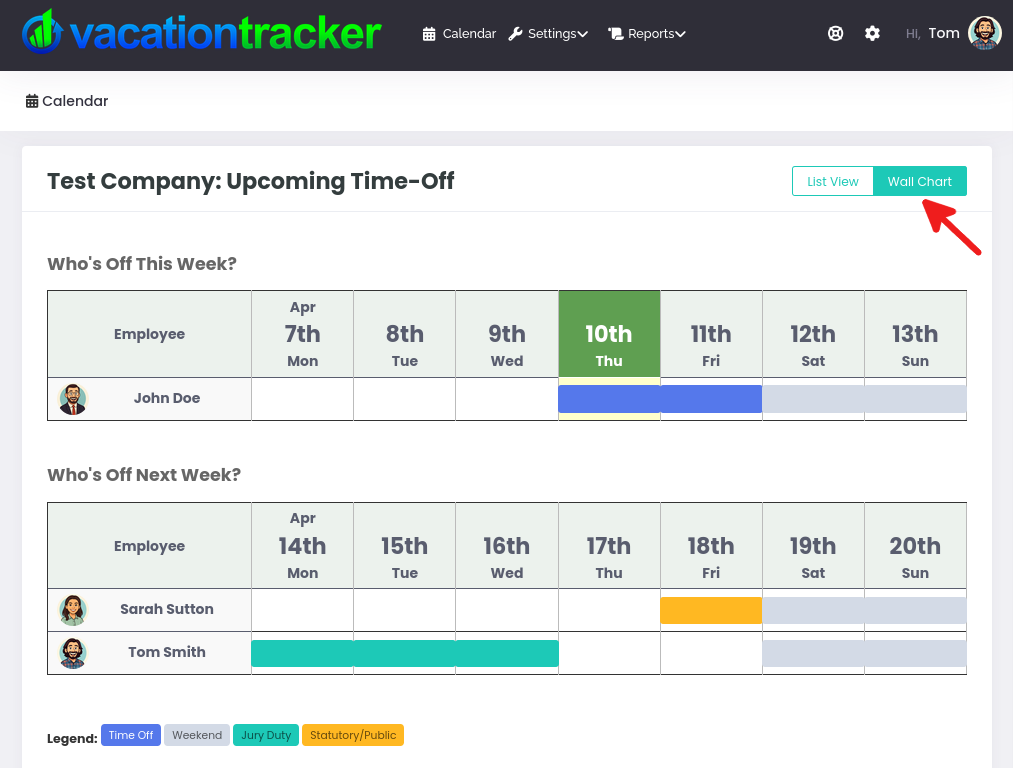
The Upcoming Time-Off Report will now be displayed. You can click to change the layout to Wall Chart:
Or click on List View for that layout:
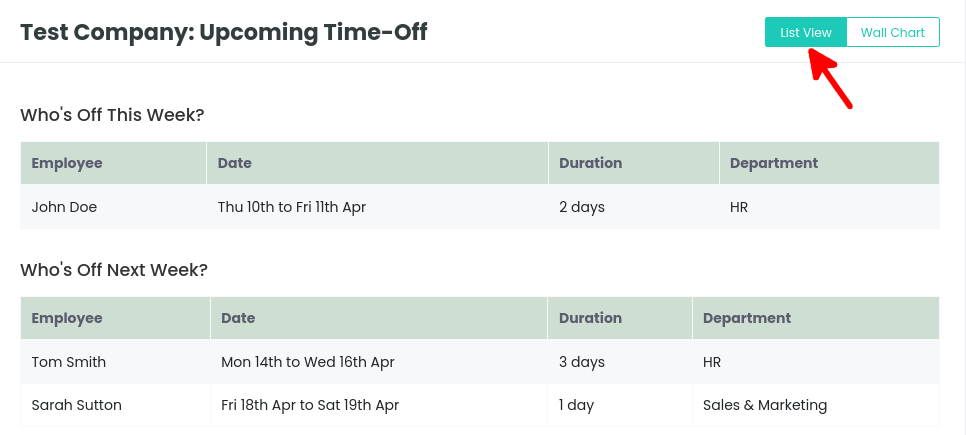
Regardless of what layout you choose here, you will see the approved time-off for the current week plus one week in the future. These reports are also printer friendly.
Note: Events shown are dependant on the privilege scope of the logged in employee - see privileges & scopes for more information.
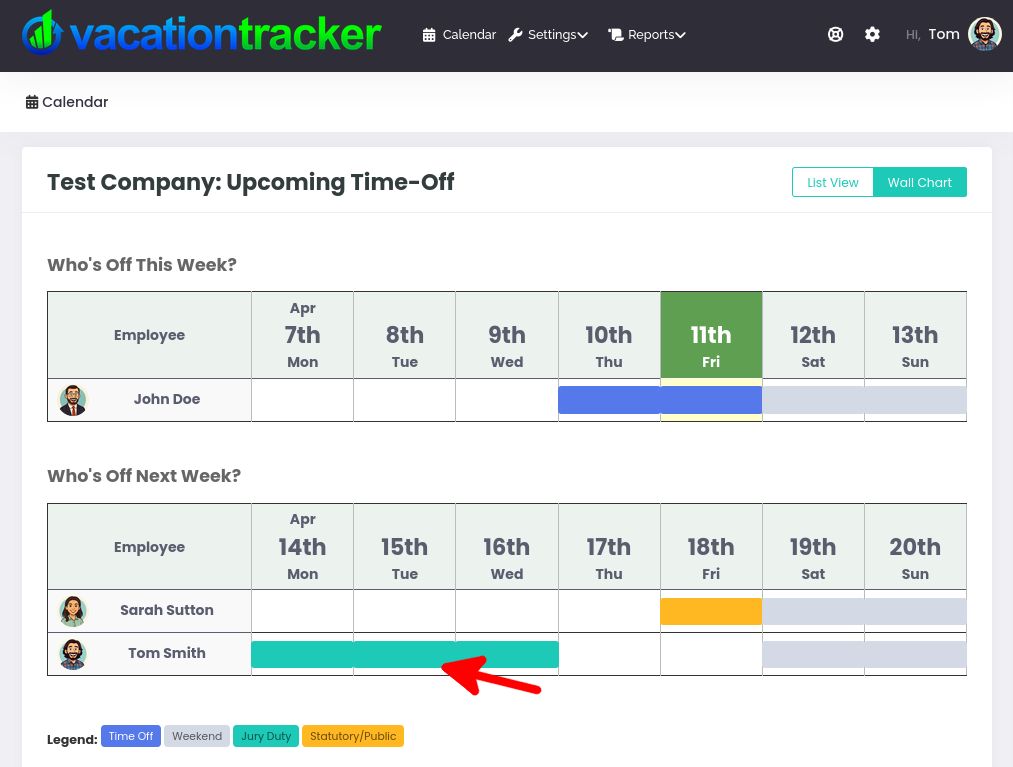
In the following example, we are logged in as employee Tom Smith and using the wall chart layout. You can see that Tom Smith has upcoming time-off, as do two other employees, John Doe and Sarah Sutton. While Tom Smith can see the scheduled time-off for John Doe and Sarah Sutton, he is not able to click on their scheduled time-off on the wall chart. This is because Tom Smith is an Employee and not an Administrator so he cannot make changes or request changes to other employees scheduled time-off.
However, Tom Smith can click on his own upcoming time-off on the wall chart to see more information:
When he clicks on it, a popup will open and it shows all the information about that time-off. From here, you can click on the blue Make Changes button or Close to close the popup.
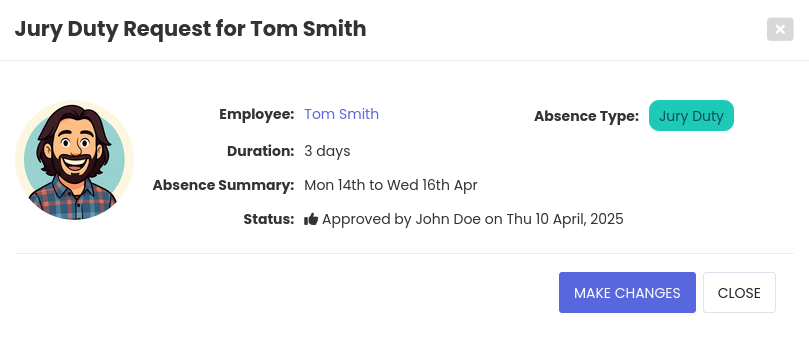
Note: If you need to make changes to your time-off, see changing or cancelling existing time off for more information.
Time-Off Summary Report:
As an Administrator to view the Time-Off Summary report, click on the link as shown below:

You will now be on the main Time-Off Summary Page. Here is an example with no filters applied:

So, you can view all time-off (i.e. for all employees, departments, locations and status) or you can filter what you see using the different filtering options available. We will discuss these filters in more detail next.
Time-Off Filters:
- Employee (i.e you can look up individual employees).
In this example we have chosen to view employee Tom Smith’s time-off information:

- Status (i.e. using tags you can refine your search, “pending”, “taken”, “approved” etc.).

- Department (select a Department using the drop-down menu).
In the following screenshot, we have filtered to only see employees in the “Sales & Marketing” Department of our company:

- Location (select a location using the drop-down menu).

- Start Date and/or End Date - using specific dates to see who has time-off scheduled during that period or on a particular date.
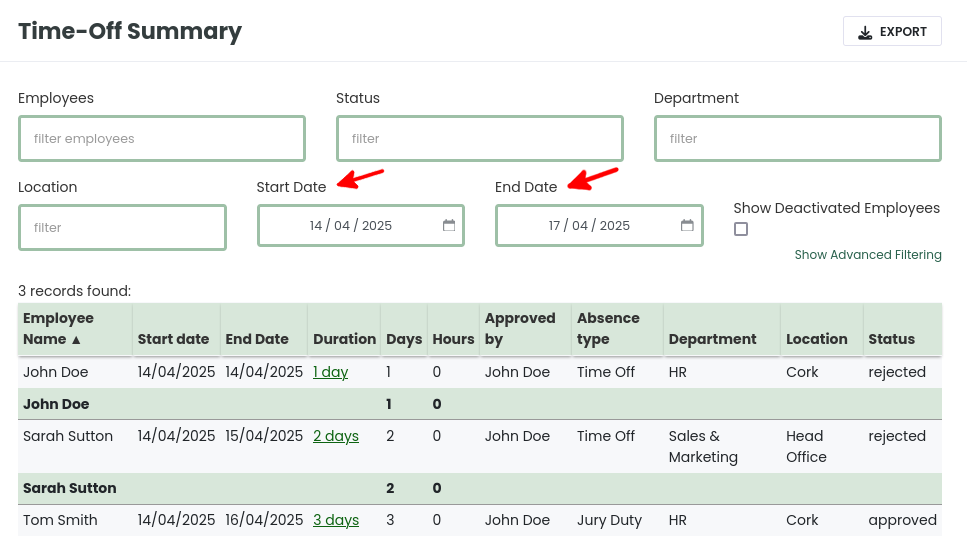
You can also use a combination of the above filters, here we have set the Department filter to “HR” and the Status to show “Approved” only. This means we will only see employee(s) time-off from the HR Department that has been approved:

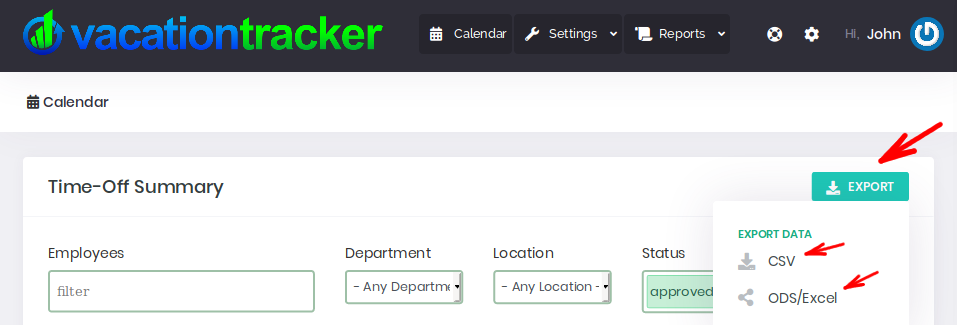
Exporting Your Time-Off Summary Report:
You can also Export your Time-Off Summary Report. To Export the data, from the Time-Off Summary page click on the Export button and choose your preferred Format from the drop-down menu i.e CSV or ODS/Excel:
Allowance Report:
The Allowance Report gives you an overview of the annual allowance for each one of your employees.
As an Administrator to view the Allowance Report, click on the link as shown below:

The Allowance Report will take a few moments to appear, you will see a message informing you of this:

Once the Allowance Report displays, it will look something like this:

As you can see, you can once again filter by Employee, Year, Department, Location and Absence Policy type. You can also export the data (using CSV or ODS/Excel), which follows the same process as outlined above.